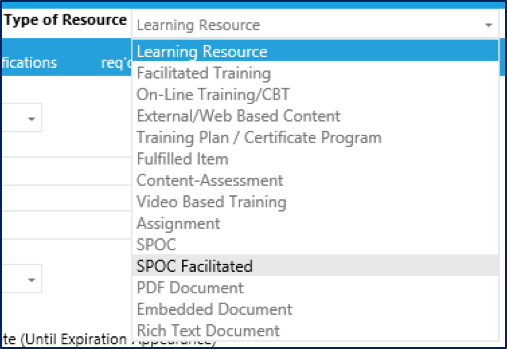
To create a Facilitated Small Private Online Class, go to Resources > Maintain Learning Resources, in the Navigation Bar of the Administrator's Console. Click the New button in the top toolbar. In the Type of Resource drop-down at the top of the Overview tab, select SPOC Facilitated.
Select Facilitated as the Media Type.
All other set-up steps are the same as those required to Create a SPOC.
A Facilitated SPOC has a specific start date. This allows the instructor/moderator to tailor the items on the announcement and discussion boards to correspond to the training material that the learners are currently taking.
The process to create a SPOC facilitated session is the same as creating any other facilitated session. Go to Resources > Maintain Facilitated Sessions in the administrative menu and click Add, in the top toolbar, to add a new session. The Add a New Class window will open.
Select the desired SPOC resource and click Add. The new class session screen will open. Click the Edit button in the top toolbar to edit the details of the session.

Enter the SPOC session date, start time, and Instructor. The venue field can be left blank, though a SPOC-specific venue could be created, if desired.
Click the Add button (plus icon, pictured above) at the left of the screen to update your changes.
The remainder of the setup is the same as any other facilitated class session.
Set a registration open and close date.
Allow participants to reschedule.
Set a maximum participant number.
Use the Enrollment tab to view and edit enrollments.
When the SPOC is complete, credit can be manually granted on the Credit tab.
Manage Announcements and Discussion Tabs